
What do you think it costs to raise a child to the age of 17?
The most modest estimate is around a quarter of a million dollars. And that’s a low-ball. (If you want to think about adding in a U.S. college tuition, that’s a whole other story.) So most families find themselves making major financial adjustments long before the baby is born.
For gay people, the situation is even worse.
By definition, a gay couple cannot have a child for free. Whether they adopt or undertake surrogacy, they’re paying bills long before the baby is in their lives. So whether they’re fostering, adopting or using surrogacy, gay couples (and some straight couples, of course) have to shell out $2,000 to $150,000 to start their family. And that’s if everything works out the first time.
So as you can imagine, we had to pay a pretty penny to make our dreams become a reality. And even though I’d do it over and over and over again, that doesn’t change the fact that Papa is now on a budget.
A very big, very serious, very important (and incredibly lame) budget.
And what do you do when you’re on a budget? You don’t spend money.
And what happens when you don’t spend money? You don’t buy adorable things for your unborn babies.
And what happens if you don’t buy adorable things for your unborn babies? You have an empty nursery. And I’m not going to let that happen. Mark. My. Words.
So I am on a mission to design and create a beautiful nursery at an extremely cost-effective price. In this multi-part “Nursery On a Budget” series, I’m going to find my dream nursery decorations and then recreate my own, super-cheap versions.
So if you’re about to start a family and are already counting your pennies, you’ll love this nursery-themed craft project. (And me.)
And if you’re super rich and can’t be bothered with “cheap” crafting, stop reading this right now and go spend a few hours on my Pinterest page. You can thank me later.
***
The first nursery decorations that caught my eye, which happens to be what inspired our theme, were these adorable French-made papier-mâché animal heads from edit58.
Unfortunately, these type of masks are super expensive ($40 – $150 each). I originally thought about going out and buying the necessary materials to make them, but I thought I’d give myself a challenge. A challenge to spend $0.
I’m going to only use things found around my house to bring my jungle-themed nursery to life. And if I hate it, well, I’ve literally only lost time.
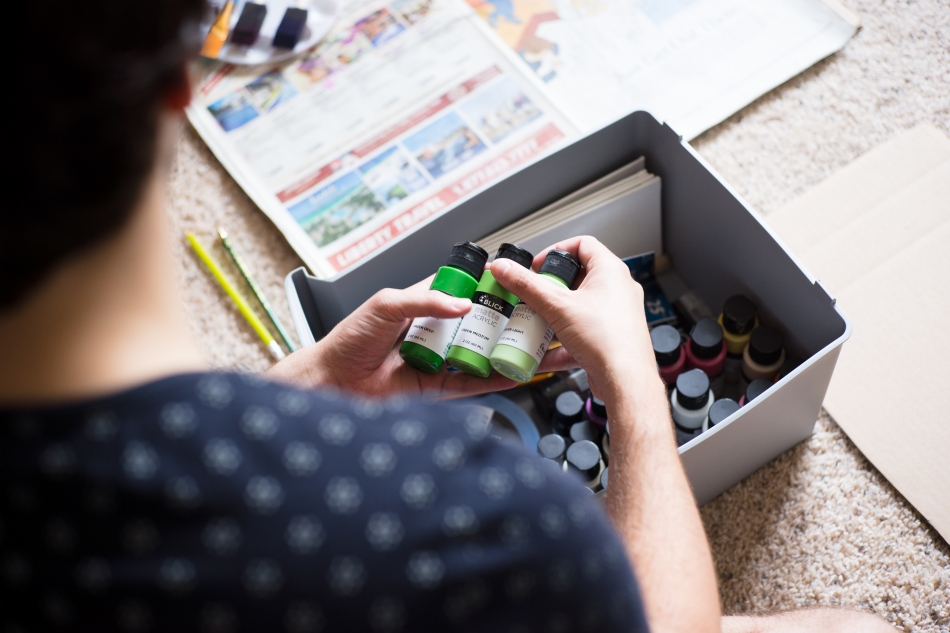
Step 1: Find your supplies
I already had random paint lying around the house. If you don’t, that shouldn’t stop you from replicating this look – the same Blick Matte Acrylic Paint was on sale for $1.48 at my local art supply store just this weekend.
For the base of the “masks” I found inspiration where I least expected to: the trash. Yup. I found a used cardboard box next to the dumpster and had everything I’d need (minus my X-ACTO knife, a pencil, tape and string) to replicate those fancy jungle masks.
If you don’t have cardboard, you could also use brown paper bags, if you’d like a grittier DIY look and feel.
Step 2: Draw & cut
First I had to decide what animals to make. I borrowed from the original image and decided to make an elephant, a lion, and a fox. But I also wanted to add my own personal favorite animals to the mix, so I decided to bring a giraffe, a flamingo, a raccoon, a bunny, a frog and a hippo to the party.
I started by sketching the outline of each animal’s head onto the box using a pencil. This allowed me to make as many mistakes as I wanted. And boy, did I make mistakes.
Using an X-ACTO knife, I carefully cut each head out, and used an eraser to remove any remaining lines. I then used my lucky scissors for the finishing details, making sure that each side of the head was symmetrical.


Step 3: Paint your “masks”
The painting phase is where the challenge (and fun) really began. I decided, for the sake of the blog, to take two different approaches:
The first is a more modern approach. If you’re not a great painter and are worried about the details of each animal face, then this is perfect for you. Simply paint the base of the animal face. In this case, green for a frog. After the paint dries, paint another coat. And another. Three to be exact! Then choose an accent feature on the animal’s face. In this case, I decided to draw the frog’s nose. Simply paint that accent in a lighter or darker color, and let it dry. It’s as simple as that.
Pro Tip: If you’re not sure which accent to feature, simply grab a piece of paper and sketch out the full face in detail. In most cases, you’ll want to choose the largest item on the face (nose, spots, eyes, etc.). And if that’s too difficult, just copy what I’ve done below.
The second approach is a little more ambitious. When you’re done painting the accent piece, continue painting the rest of the face, adding in as much detail as you want to really bring the face to life. I suggest you paint the animals sleeping, but feel free to take any approach you’d like. For inspiration, I suggest you go to Google and type in “______ cartoon.” The image results helped me locate simple animal drawings that I copy, so feel free to take a similar approach.


Step 4: Hang your art
Once you have all your animal “masks” painted, it’s time to figure out how to hang them. Because they are made out of cardboard, they are super light so won’t require fancy hanging equipment. Simply tape some string down to the back of the head and hang them on a thumbtack pressed into the wall. You can also just use double-stick tape or reusable mounting strips.


And then you’re done. A $0 project that only takes about 2 hours of painting.
Deciding where and how to hang them in your nursery is completely up to you, but maybe you’ll find these arrangements inspiring…


Stayed tuned for more from my “Nursery On a Budget” series.
Until next time, stay crafty.


Love the colors! Such a creative way to make a nursery come to life without breaking the bank.
LikeLiked by 2 people
Thanks, Sarah! ❤
LikeLike
I love these! Fantastic! 🙂 Your babies are going to love them
LikeLiked by 1 person
Thanks, Meg! ❤
LikeLike
Hi Lovely Man! I love your excitement and all that you are doing! I would love to share a nursery on a budget idea with you that I am doing if you are interested 🙂 I am also on a major budget and as much as I would love to do nothing but a Land of Nod filled nursery, its more of a “thank goodness I was a theatre major and have lots of skills” nursery
Keep the good work, I find this blog so lovely.
LikeLiked by 1 person
I’m 100% interested, Jamie! And boy oh boy am I obsessed with Land of Nod! 🙂
LikeLike